StudentShare
Contact Us
Sign In / Sign Up for FREE
Search
Go to advanced search...
Free

American Military English - Assignment Example

Cite this document
Summary
The author of the present assignment "American Military English" points out that the learning of English as a foreign language by soldiers in the military, working under the auspices of the Americans is the first formal lesson that the individuals should understand…
Download full paper File format: .doc, available for editing
GRAB THE BEST PAPER95.5% of users find it useful
American Military English
Read Text Preview

Extract of sample "American Military English"

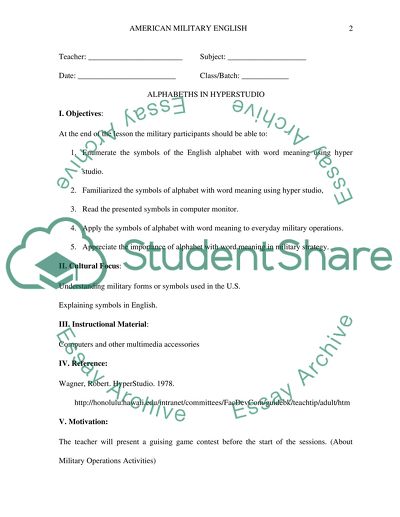
Order 289773 and Number: AMERICAN MILITARY ENGLISH Introduction The learning of English as foreign language by soldiers in the military, working under the auspices of the Americans is the first formal lesson that the individuals should understand. In as much as the men in uniform are usually considered as adults, some experts say in the past that teaching is a bit difficult. But, the modern tools in information technology hugely influence the ease of teaching the appropriate English terminologies to men in uniform nowadays. The first and mainstream lesson is the teaching of recognition and reading the alphabets. Alphabets are usually taught employing association with images for quick memory. This can further be enhanced with the use of HyperStudio which is a multimedia software program system using McIntosh computers. The delivery of the lesson requires having a copy of HyperStudio and tutorial running simultaneously on a preferable McIntosh computer system. This will allow receipt of help from McIntosh when assistance is necessary.1 Body Detailed Lesson Plan: Teacher: ________________________ Subject: ____________________ Date: _________________________ Class/Batch: ____________ ALPHABETHS IN HYPERSTUDIO I. Objectives: At the end of the lesson the military participants should be able to: 1. Enumerate the symbols of the English alphabet with word meaning using hyper studio. 2. Familiarized the symbols of alphabet with word meaning using hyper studio, 3. Read the presented symbols in computer monitor. 4. Apply the symbols of alphabet with word meaning to everyday military operations. 5. Appreciate the importance of alphabet with word meaning in military strategy. II. Cultural Focus: Understanding military forms or symbols used in the U.S. Explaining symbols in English. III. Instructional Material: Computers and other multimedia accessories IV. Reference: Wagner, Robert. HyperStudio. 1978. http://honolulu.hawaii.edu/intranet/committees/FacDevCom/guidebk/teachtip/adult/htm V. Motivation: The teacher will present a guising game contest before the start of the sessions. (About Military Operations Activities) VI. LESSON PROPER Teacher Task Military Participants task 1. The teacher will present the animated graphics. 1. Students will view the animated graphics. 2. He will ask the participants to identify the different symbols. 2. Participants will give the name of the different symbols. 3. Participants will give the meaning of each alphabet which was presented in the computer monitor. 3. Students will boot the computer and open the HyperStudio presentations. 4. He will ask the participants to give the meaning based on military operations settings 4. Let them give the meaning. 5. The teacher will ask the participants to give the proper sound of each alphabet with assigned meaning. 5. Participants will pronounce the words presented on the monitor. 6. He will allow the participants to view the movie for familiarizations of sounds (Pronunciation). 6. The participants will view and listen to the movie. 7. The teacher will ask the participants to view the new animation and read the alphabet symbols with the assigned word. 7. The participants view the animations and read the alphabet symbols with the assigned word. 8. The teacher will ask the participants to spell out the symbols of the English alphabet with word meaning. 8. Participants will enumerate the symbols of the English alphabet with word meaning. 9. The teacher will ask the participants if they usually encountered the word meaning in every operation. 9. Participants will explain their previous experience with alphabet symbols with the assigned word. 10. The teacher will ask the participants to try out different animation and graphics 10. Let them do another designed animations. VII. Evaluation: A. Give at least five different symbols of the English alphabet with word meaning you encountered in the discussions. 1. _______________________ 4. _______________________ 2. _______________________ 5. _______________________ 3. _______________________ B. From different symbols of the alphabet which was presented on the board match it with the corresponding word. Set A Set B (Board) __________1. __________2. __________3. __________4. __________5. VIII. Assignment: 1. What is the proper command for execution 2. How do deliveries of the intonations affect the mode of interpretations 3. What are the different issues concerning proper intonations 4. Are regional accents affecting the intonations 5. Do mouth and tongue affect the delivery of words The use of HyperStudio as an instructional tool to teaching American English as foreign language is illustrated below by Mr. Robert Wagner of McIntosh: "Welcome to the Building Learning with Technology HyperStudio Tutorial This tutorial recommends having both a copy of HyperStudio and this tutorial running at the same time. This will allow you to receive help from us as you explore HyperStudio. The "Table of Contents," located at the left of this page, allow you to skip those parts of the program that you already feel comfortable with. If you already understand how to insert text into a Word document you do not need to waste your time reading how to do it again here. For those of you that would like to take this tutorial step by step, there is a "Next" button at the end of every page that will take you to the next page in the tutorial. Good luck, have fun, and most of all, do not be afraid to explore HyperStudio. We have covered most of the basics for creating effective hyperlinked presentations, but we do not have space to cover all of the wonderful tools thatHyperStudio comes with. Try new buttons and shortcuts to see what happens. Click the arrow to start the tutorial or pick a page from the "Table of Contents" at the left of the screen Opening a New Stack A new stack in HyperStudio is akin to a stack of index cards. Your presentation will be a "stack" of these index cards placed one on top of the next. A stack is the entire presentation, made up of those cards. Upon opening HyperStudio you will see an image like the one shown below. To start a new presentation you will click on the "New Stack" button. After clicking on "New Stack" you will see the following dialog box. Click yes to start your new presentation Click on the arrow to continue with the HyperStudio Tutorial Setting up your screen to begin working The first step in getting HyperStudio ready to work with is to bring your toolbars into view. To do this, click and hold down the "Tools" menu and drag the box that pops up anywhere else on the screen. This will leave those tools on your screen for easier use later. You are going to do the same thing with the color palette. Click on "Colors" and hold your mouse button down. Now drag that color palette to another place on the screen. You should see something like the following on your screen. Click on the arrow to continue with the HyperStudio Tutorial Putting a Background on Your Card All cards start with a background. As a default, your background is a solid white color. You have the option of either changing this default to another solid, a pattern, or an image that you have stored on your computer. Remember that you have already pulled your color palette down so that you can see the available colors. The first step is to decide which color or pattern you want on your card. To do this you need to click on the desired color on the color palette as shown here. We have chosen a deep blue for our background on this card. You have now chosen a color; the next step is to select the "Paint Bucket" from the tool bar. Below you will see an image of your tool bar with the "Paint Bucket" already highlighted. With your color or pattern selected and the "Paint Bucket" chosen you can now move your cursor over your card to see the actual "Paint Bucket" icon over your card. Click once anywhere on the card to fill the background. There are a number of ways for you to change the background color or pattern of your card. If you are just using colors you can choose a new color and use the "Paint Bucket" tool and insert that new color as described above. If you have chosen a pattern the process is slightly more difficult. You are not able to change a pattern to a color using the "Paint Bucket" tool. You are also not able to change from pattern to pattern as you would when you changed from color to color. To change your background from a pattern to another pattern you must first change to a solid color background. The "Paint Bucket" tool acts as a filler tool and most of the patterns have many small spaces that would need to be filled. This requires you to change to a solid background so the "Paint Bucket" can overwrite the entire background at once. Click on the arrow to continue with the HyperStudio Tutorial Adding Text to Your Cards Most of us find it necessary to add text to our cards to relay information. We can not be reliant on just graphics to get our lessons or messages across. There are a number of different ways to place text on your card. We will explore two of these methods. Using a "Text Object" The most reliable method for placing text on your card is a "Text Object." To place a "Text Object" on your card you will need to click on "Objects" "Add a Text Object," as shown below. If move your cursor off of the "Text Object" you will notice a small pointing hand as your cursor. You will also notice that the same cursor is highlighted in the tool box that we have previously moved to the work space. The tool box should look like this: Clicking on the arrow in the tool box will allow you to move the "Text Object" as well as resize it. Click back on the pointing hand to allow you to type or change what you have written in the "Text Object." Using Plain Text Using plain text is not a preferable method for placing text on your cards. The main problem with using plain text is that it acts like a basic color when it comes to backgrounds. If you decide to use the fill method for placing your backgrounds then the small holes in letters like "O" and "P" will not be filled in. Also, if you decide to erase your background to change the color or from a pattern to another pattern you will loose all plain text you have inserted. Therefore, the only time we recommend using plain text is when you are absolutely certain that you are not going to make any more changes to the card. It is even a hassle to try to fix any mistakes you make with plain text. You will have to use the easer tool to get rid of the mistake and start over. That said, to place plain text on your card you will need to click on the alpha tool in the tool box. It looks like this: After you have clicked on the alpha tool you can click anywhere on the card and start typing. You will notice that the color of your text is the one you have chosen on your color palette. In the following instance we have chosen a blue color for our text: Click on the arrow to continue with the HyperStudio Tutorial. Adding Graphics to Your Card Adding graphics is a simple and easy way to personalize your card. To do this click on "Objects" "Add a Graphic Object." You will then be given a list of pictures to choose from. These choices are grouped by object or content. If you are preparing a presentation on computers, double click on computers and you should see a group of pictures that will suit this purpose. To select an individual image you can either use the "Selection Box" or the "Lasso" to make an outline of the picture that you want to add to your card. To do this click either on the button that looks like a box with hashed lines, or the lasso and with the mouse circles the picture. We have shown what the screen will look like after you have selected one of the images. You will notice that the image of the woman at the computer is different from the others. This allows you to view what you have selected. When you are done circling an image, a red-dashed line will be around your graphic. If by chance you circle the wrong picture or get a piece of another picture, simply click with the mouse and the red-dashed line will disappear, allowing you to circle again. After you have successfully circled the picture you want, click ok. A prompt will then come up on your screen, read it and click ok. You now can move your graphic to anywhere you want on the card, andwhen you are satisfied with the location click ok button. Click on the arrow to continue with the HyperStudio Tutorial. Animating your Graphics After you have placed your graphic in the right spot you can choose to animate it or give it sound, even play a movie. This makes the images on your card come to life. When you place your graphic on your card and click the mouse a prompt will come up titled graphic appearance. It should look similar to this depending on what version of HyperStudio you are using. Click on "Actions" to choose the action that you would like graphic to do. You will then be asked what type of action you would like. For our purposes we will choose "Play Animation" But you can also do "Play a Sound" or "Play a Movie." You will then be asked where you would like to get your animation from, choose disk library. You can then choose between either HyperStudio Art or HyperStudio Animation. We will choose HyperStudio Art. Then from the "Art" file choose computers again and encircle the mouse. HyperStudio will then encircle your graphic with that familiar red-dashed line. Next click "Ok" then you will see the mouse come up on a blank card. Don't worry your graphic will come back in a minute. Now move your mouse in a way that also moves the mouse on the screen at the same time. This path that you make will be the path that it will travel when you click on your graphic. Your screen should now look like this. . You can now click ok. You will then be able to test out your animation. The next prompt that comes up should look familiar; just click "Done." Another familiar prompt will come up, again click "ok." You should now see your card with your graphic back up, I told you not to worry, and to view your animation click on the hand on your tool bar. Now with the hand click on your graphic. You should see the mouse graphic move on your screen following the path that you created. How much fun was that!!! Now you can play around and try out different animations and graphics. Just follow the same directions for this one. Click on the arrow to continue with the HyperStudio Tutorial Adding Buttons When you are creating a stack (a presentation) you will usually create more than one card. Buttons are an easy way to move from card to card. To create a button you will need to click on "Object" "Add a Button" as shown below. You will then see a dialog box titled "Button Appearance," shown below. This is where you can choose what your button will look like, its name, or you can choose an icon instead. Here's an easy way to make a sample button: Click on the name section of the card and type "Next Card." Next choose "Icons" where you decide which image you wish to use for your button. For our purposes choose the hand with the finger pointing to the right. Click "OK" and your screen should look like the one below. Here you can also change the background and font color of your button. You can accomplish this by clicking on the color square that you like. After you are satisfied with the look of your button, click "OK." The familiar red-dashed line should be around your button. You can now either move the button to its desired location or continue with the button set up by clicking anywhere else on the card. Once you click off the button, you will see the "Action" menu come up on the screen, read it and proceed. Under "Places to Go" choose "Next Card," and then choose fastest. Then you can click on "Done." Your button should now take you to the next card when you click on it. On your title card you only need one button because you only have one direction to go - forward. All other cards should have a backwards and a forwards button. Your last card should have a button that takes you to the first card. You can make your buttons take you anywhere by clicking on various locations on the "Places to Go" section. For example, if you want to make your button go backwards choose previous card and if you want your button to take you to the first card choose "Home Stack." It's that easy. Under "Things to Do:" you can make the button initiate another type of action. ***You will need to choose "None of the above" under the "Places to Go" menu for these choices to be activated*** Click on the arrow to continue with the HyperStudio Tutorial Adding a New Card After you have finished creating your first card, you will want to start on another card. To do this, choose "Edit" "New Card." A blank card should appear on your screen. You can start to create on that card just like you did on the previous ones. Click on the arrow to continue with the HyperStudio Tutorial Deleting a Card Sometimes there will be too many mistakes to attempt to correct each one. If this should happen it may be easier or quicker to just erase the whole card and start over, andto do this select "Edit" "Delete Card" as shown below. HyperStudio will then ask you if you want to delete the entire card, click "Yes." You should now have a blank card in front of you. If you happen to choose "Delete Card" by accident simply go under "Edit" and select "Undo Deletion," your deleted card will reappear. You must do this before any other action is taken because HyperStudio is not like the newer versions of Microsoft's Word in that you can undo a great many actions. HyperStudio will only let you undo the last action taken. Click on the arrow to restart the HyperStudio Tutorial"2 Conclusion Language instruction especially American English to foreigners in the Military is crucial to the achievement of organizational goals. Thus, accurate and precise terminologies can currently be taught using HyperStudio multimedia software program system of McIntosh. Bibliography Bonfiglio, Thomas Paul. Race and the Rise of Standard American. New York: Mouton de Gruyter, 2002. Bridges, Tyler. The Rise of David Duke. Jackson, MS: University Press of Mississippi, 1995. Bronstein, Arthur J. The Pronunciation of American English: An Introduction to Phonetics. New York: Appleton-Century-Crofts, 1960. Holm, John. Languages in Contact: The Partial Restructuring of Vernaculars. Cambridge, England: Cambridge University Press, 2003. Website Welcome to The Building Learning with Technology HyperStudio Tutorial. http://www.education.umd.edu/blt/hyperstudio/ rets: 4/14/09. Wagner, Robert. HyperStudio. 1978. http://honolulu.hawaii.edu/intranet/committees/FacDevCom/guidebk/teachtip/adult/htm rets: 4/13/09. Read More
Cite this document
  • APA
  • MLA
  • CHICAGO
(American Military English Assignment Example | Topics and Well Written Essays - 3000 words, n.d.)
American Military English Assignment Example | Topics and Well Written Essays - 3000 words. Retrieved from https://studentshare.org/english/1527206-american-military-english
(American Military English Assignment Example | Topics and Well Written Essays - 3000 Words)
American Military English Assignment Example | Topics and Well Written Essays - 3000 Words. https://studentshare.org/english/1527206-american-military-english.
“American Military English Assignment Example | Topics and Well Written Essays - 3000 Words”, n.d. https://studentshare.org/english/1527206-american-military-english.
  • Cited: 0 times

CHECK THESE SAMPLES OF American Military English

Economies and social structure of New England. The British-American conflict

Its clean water and cool air played a part in ensuring a healthy way of life which to a greater extent added ten years to the average english life span (Boyer 56).... For example, culturally, the majorities of settlers were of english origin, spoke english, and practiced english traditions (Boyer 62).... In all the colonies, men were made the leaders, and the english law gave them unlimited powers.... The development of the British-american conflict At first, the conflict between the British and America was triggered by the financial costs of Anglo-French wars (Middlekauff 9)....
4 Pages (1000 words) Essay

The American Revolution

The American Revolution marked new beginning in political thought especially the growth of new republican ideas which conflicted with traditional and english set of tenets.... In 1763, as an aftermath of the treaty leading to the end of French and Indian war, France lost its military might to the American colonies and all North American possessions located on the East side of the Mississippi River with the exclusion of two islands in Newfoundland.... The American Revolution started in 1763 after the British military recorded a series of victories during the French and Indian war that led to an end of the French military might that was initially a threat to the British North American colonies....
7 Pages (1750 words) Research Paper

Anglo-American Special Relationship

An author of this paper suggests that despite the unequal tilt of the so-called “special relationship” between the US and the UK owing to the need for dependence by UK's declining international power, shared sentiments for democracy count much in this bonding.... hellip; There are widespread assumption on both sides of the Atlantic that the special relationship between the United Kingdom (UK) and the United States (US) has been declining in significance as both have gone through times of war, conflict, peace and close cooperation (Wikipedia, 2006), and will most likely to go on (Rachamn, 2001)....
8 Pages (2000 words) Essay

What Makes Latin America a Distinct Region

rdquo; the author looks at the distinction between Latin America and Anglo-America, which is the predominant language in the Americas by which Romance-language and english-speaking cultures are distinguished.... When it comes to politics, Latin Americans also share a penchant for left-wing affiliations and guerilla wars, as well as a wide smattering of military coups and sieges.... Factors that Divide Latin American CountriesFor years, the countries have been divided by guerrilla wars, military coups, strikes, assassinations, demonstrations and other means to overthrow the ruling parties....
3 Pages (750 words) Assignment

Misbeliefs about languages

The second argument is that “the english language traces its ancestry back to Latin”.... Again, this is a false statement since the roots of the english language is actually from Old english.... History tells us that during the 5th century, the group of Anglo-Saxon settlers that invaded the eastern coast of Great Britain were the one s that brought this type of Old english.... The modern english language cannot have its roots in Latin since it is considered a West Germanic language....
4 Pages (1000 words) Essay

Aspects of the English and Spanish Societies that Arose in the Americas Prior to the 1790 Year

On the other hand, english colonization was motivated by unemployment, religious freedom desires, market desires and adventure desires.... The english dominance of America was because of various reasons.... Finance provisions by their company, which intended to find their way to India through America, by guaranteeing same rights to its settlers as english citizens.... Roanoke and Jamestown were the first english successful... Their culture, social ideas, and language were common to those of North american....
4 Pages (1000 words) Essay

The Impact of the American Revolution on Ireland

Even those who were forced to subsequently embrace the secular desire of the British and the english settlers eventually realized the oppressive and tyrannical rule of the Crown.... Ireland, thereafter, was bestowed to the english Crown and immediately after english settlers began to trickle into the Irish territory to settle into the Crown's new acquisition bringing with them their culture, institutions, laws and other influences.... It was “at once a precedent and a political convert, a diplomatic diversion and a military decoy, a target of economic pressure to exert pressure in its turn on Britain and a most favored nation embodying the hope of future commercial profit....
10 Pages (2500 words) Term Paper

Beheading of Two American Journalists

Upon completing his statement, the masked man cloaked in black then personally and directly addresses the President of the United States in the english language, which appears to be in a British accent (Johnson& Barton, 2014, pp.... The paper "Beheading of Two american Journalists" is devoted to the ISIS group that has been sending violent messages to their alleged enemies, especially the US, implicating direct terrorism acts.... The militant group displayed a series of videos of the brutal murder of two american citizens....
12 Pages (3000 words) Case Study
sponsored ads
We use cookies to create the best experience for you. Keep on browsing if you are OK with that, or find out how to manage cookies.
Contact Us